
Text to Image AI — Best AI Image Generator Free Online | Fast Moro AI
01 / Start with a picture in mind
Explore what Text to Image can create
Product visuals, portraits, and imagined worlds. Describe what you see in your mind and choose the style that fits.


- Natural language prompts
- Portrait or landscape
- Multiple image models
02 / Give your idea a little direction
Better Text to Image starts with a clearer prompt
Give your text to image idea a subject, a place, and a visual direction. A few concrete details help describe the picture you actually want.
Subject
Name the main object or person. Add the color, material, or action that makes it distinctive.
Setting
Describe where the subject belongs and what should appear around it.
Light & framing
Specify the light and viewpoint. Say where you want the subject and any empty space.
Style & finish
Choose a visual treatment, such as photography or illustration, then describe the colors and textures.
Start with the idea
A red coffee cup.
Add the details that matter
SubjectA red ceramic coffee cup,Settingon a pale stone table beside a window,Light & framingsoft morning side light, close-up composition with empty space on the right,Style & finisheditorial product photography, warm neutral colors, visible ceramic texture.
03 / Go beyond a single frame
Take Text to Image beyond a single frame
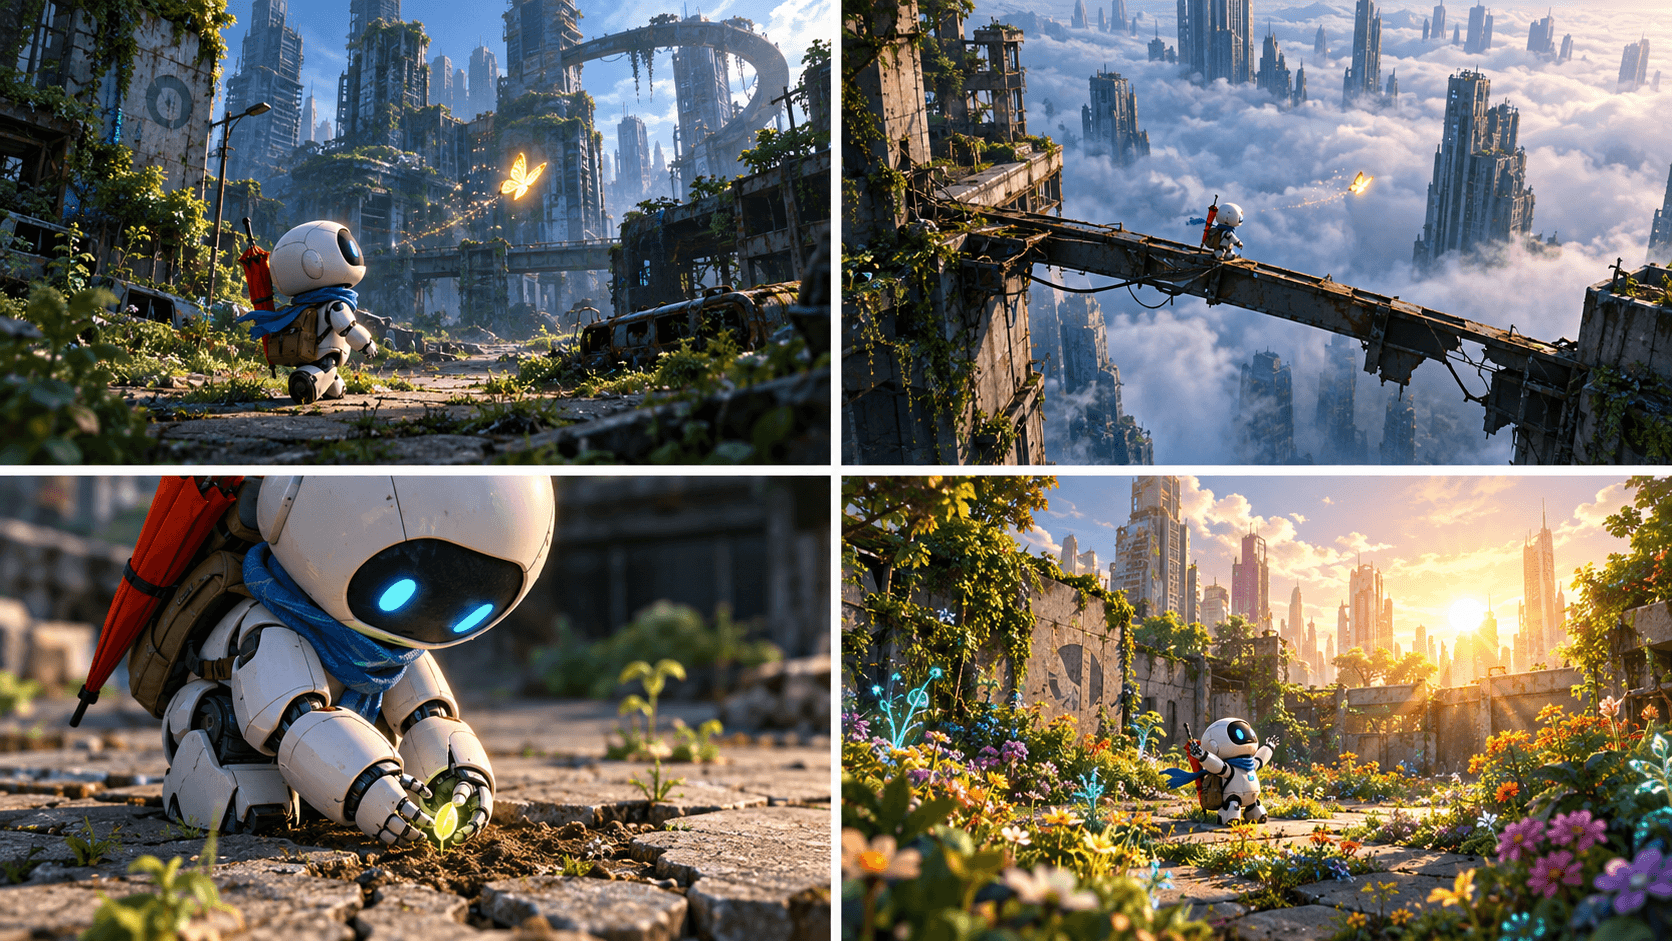
A little robot follows a golden butterfly through an abandoned city, finds a seed, and grows a garden.
Plan the sequence first, then refine how each scene should look.
- Choose 2–16 panels; up to 10,000 characters
- Edit each scene, shot size, camera move, and duration
- Keep your draft and restore scripts from history
Choose Story panels in the workspace. Shot planning is free; the image uses the selected model and resolution’s normal credits.
04 / Keep your creativity moving
A picture you love is a place to start
No need to find and upload the picture again. Choose Use image on a finished result, pick what to create next, and the selected image goes with you.
Make another version
Change the style, scene, or details with a new description, and refine your next version.
Set this scene in motion
Use the image as a first frame and describe the action and camera movement you want.
Take your subject somewhere new
Use visual elements from the picture as a reference, then describe a new scene and action.
How to use Text to Image in four steps
Write a prompt or a story
Describe the subject, setting, and style for one image, or enter a complete story to plan a sequence of shots.
Choose a mode and settings
For Story panels, choose 2–16 panels and edit the free shot plan. Select your image model, aspect ratio, and resolution.
Generate your image or storyboard
Review the content and credit cost, then generate. Preview or download the result; storyboard creations also retain the shot script.
Use the image to keep creating
Choose Use image on the result to bring it into Image to Image, Image to Video, or Reference to Video.
Before you start
About Text to Image AI and Story panels
A few useful details, so you can spend more time creating.
How do single images and storyboards differ?
Text to Image turns a description into one picture. Story panels first breaks a story into shots that you can edit, then generates one image containing the full sequence.
Does each storyboard panel become a separate image?
The panels are generated together in a single image. Choose any count from 2 to 16 to control the sequence and layout, with a story of up to 10,000 characters.
How are shot planning and image generation charged?
Shot planning is free. Image generation uses the selected model and resolution’s normal credits, shown before you generate. New users can claim free credits to get started.
Can I return to a storyboard and keep editing?
Your saved draft can be restored for the same account in the same browser. After generation, open a creation’s settings from history to restore its storyboard script.
Does Use image start a generation immediately?
Choosing Image to Image, Image to Video, or Reference to Video opens that tool with the selected image filled in. Review the prompt and settings, then start the next generation yourself.
Start your next Text to Image creation
Make one picture you love, or tell a whole story in frames.
Back to the workspace